Saving, emailing or printing your search results
Saving, emailing or printing your search results
Once you have done a search and retrieved a lot of records, you might want to select some of them and keep them to use later. You have several options for saving or sending this information.
Saving Records
You will probably want to save only certain selected items from your results list, not everything. You can scroll down through your list, choosing the records that interest you most. To select a record, click on the book mark icon on the far right top edge of the record. When you click on it, the icon will turn blue. This will save the record for you.
Now, look under the My dashboard menu to the left of the search screen. You will see the same Saved icon. Click it to see the record you have saved.
Cite, Share/Email and Print Options
To the right of the save option above each record note the three vertical dots. Click on it to reveal the additional options: Cite, Add to project, Share, Download.
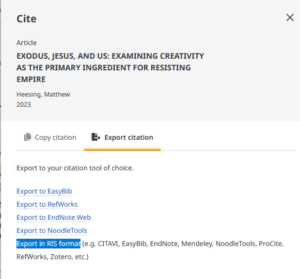
The Cite tool not only allows you to copy your desired citation to your device’s clipboard but also export it to third-party citation software such Zotero or RefWorks.
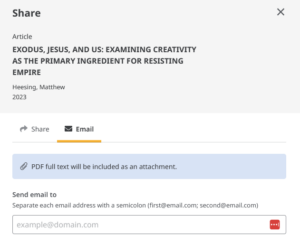
To share or email your records, click Share. The Share menu allows you to send your article to Google Drive, One Drive or create a persistent link. From the Email menu you can send a PDF full text of the article along with a citation of your record to multiple email addresses if you wish. Typically, the ATLAS database will send a separate email for each bib record. When you receive each message, you should be able to open the record by clicking on the “Persistent link.”
When you click on the “Persistent link” in the email message, the bib record will open in a new browser window. Notice that this record has a Access now PDF button within it. If the record you save has such a link, the link will be active, so that you can open the article itself without having to repeat your search.
To print your selected records, select the Download option. Once your article is downloaded and you have opened it in a new browser window select the print icon and follow the browser prompts to print.
Once you have done a search and retrieved a lot of records, you might want to select some of them and keep them to use later. You have several options for saving or sending this information, and all of them start with the Folder function.
Add records to your "Folder"
You will probably want to save only certain selected items from your results list, not everything. You can scroll down through your list, choosing the records that interest you most. To select a record, click on the blue icon that resembles a file folder, on the far right top edge of the record. When you click on it, the icon will turn into a yellow folder with a piece of white paper in it.
Notice that the record shown above has a PDF Full Text icon with it. If the record you save has such a link, the link will also be saved, so that you can open the article itself later without having to repeat your search.
Now, look at the dark-blue bar across the very top of the screen. You will now see an icon resembling an open file folder, next to the word Folder. Click on it to go to your set of saved records.
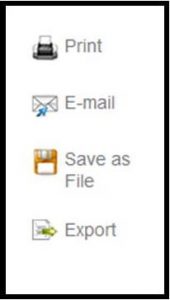
From the Folder, you will be able to do all of the other operations : Print, Email, Save as File, or Export. Click on one of those choices and follow the on-screen instructions. For help in sending or printing your selected records, see below.
Saving, emailing or printing your selected records
Click on the Folder icon in the dark-blue bar to open the list of the items you have added to your folder. It may seem silly, but to perform any operations on these records, you must select them AGAIN. You may either choose an individual record by clicking in the little box beside its title, or look for the Select / deselect all heading near the top of the Folder and click there.
Next, look at the right edge of the screen, and you will see the options for the records you have chosen. You can Print, Email, Save as File or Export these records. The Print and Save options both depend upon the capabilities of your own internet browser.
To print your selected records, click on Print. You are offered many options for formatting the records according to various style conventions (Chicago/Turabian, MLA, etc), deciding how much of the record to include (Brief Citations instead of Detailed Citations, with or without Abstracts). Make the choices you prefer, and click on the Print button. You will see a print preview page, and at this point, your browser will take over. Your browser opens the Windows print dialogue box (or the equivalent on a Mac), and that is the way you will actually perform the print function. Choose your print preferences and proceed.
To email your records, click on Email. You get the same set of formatting options, plus a set of boxes asking for your email address, a subject line, any comments, etc. Fill in this information and click on the Send button. You can send the email to more than one address if you wish.
Typically, this database will send a separate email for each bib record. When you receive each message, you should be able to open the record by clicking on the “Persistent link.”
When you click on the “Persistent link” in the email message, the bib record will open in a browser window, and it will look a lot like the record shown above.
If you wish to use the Save as File option, you can save your search results to the hard drive of your machine, or save them to a portable device such as a flash or “thumb” drive. The web browser you are using will control those functions.
The Export option is for people who are also using a bibliographic utility such as EndNote, ProCite or RefWorks. You can choose to send your selected records to yourself in one of these database formats.
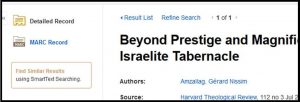
To print, email or save a single record without placing it in a Folder, click on the title of the article to open its detailed record. Then, choose from the links along the right side of the detailed record display, and then follow the instructions above.


